

User Groups are project-level and admin-only. They complement project roles: a
role determines what a user can do in nao, while groups determine which
enabled features, context, rules, and data rows apply inside this project.
How group access works
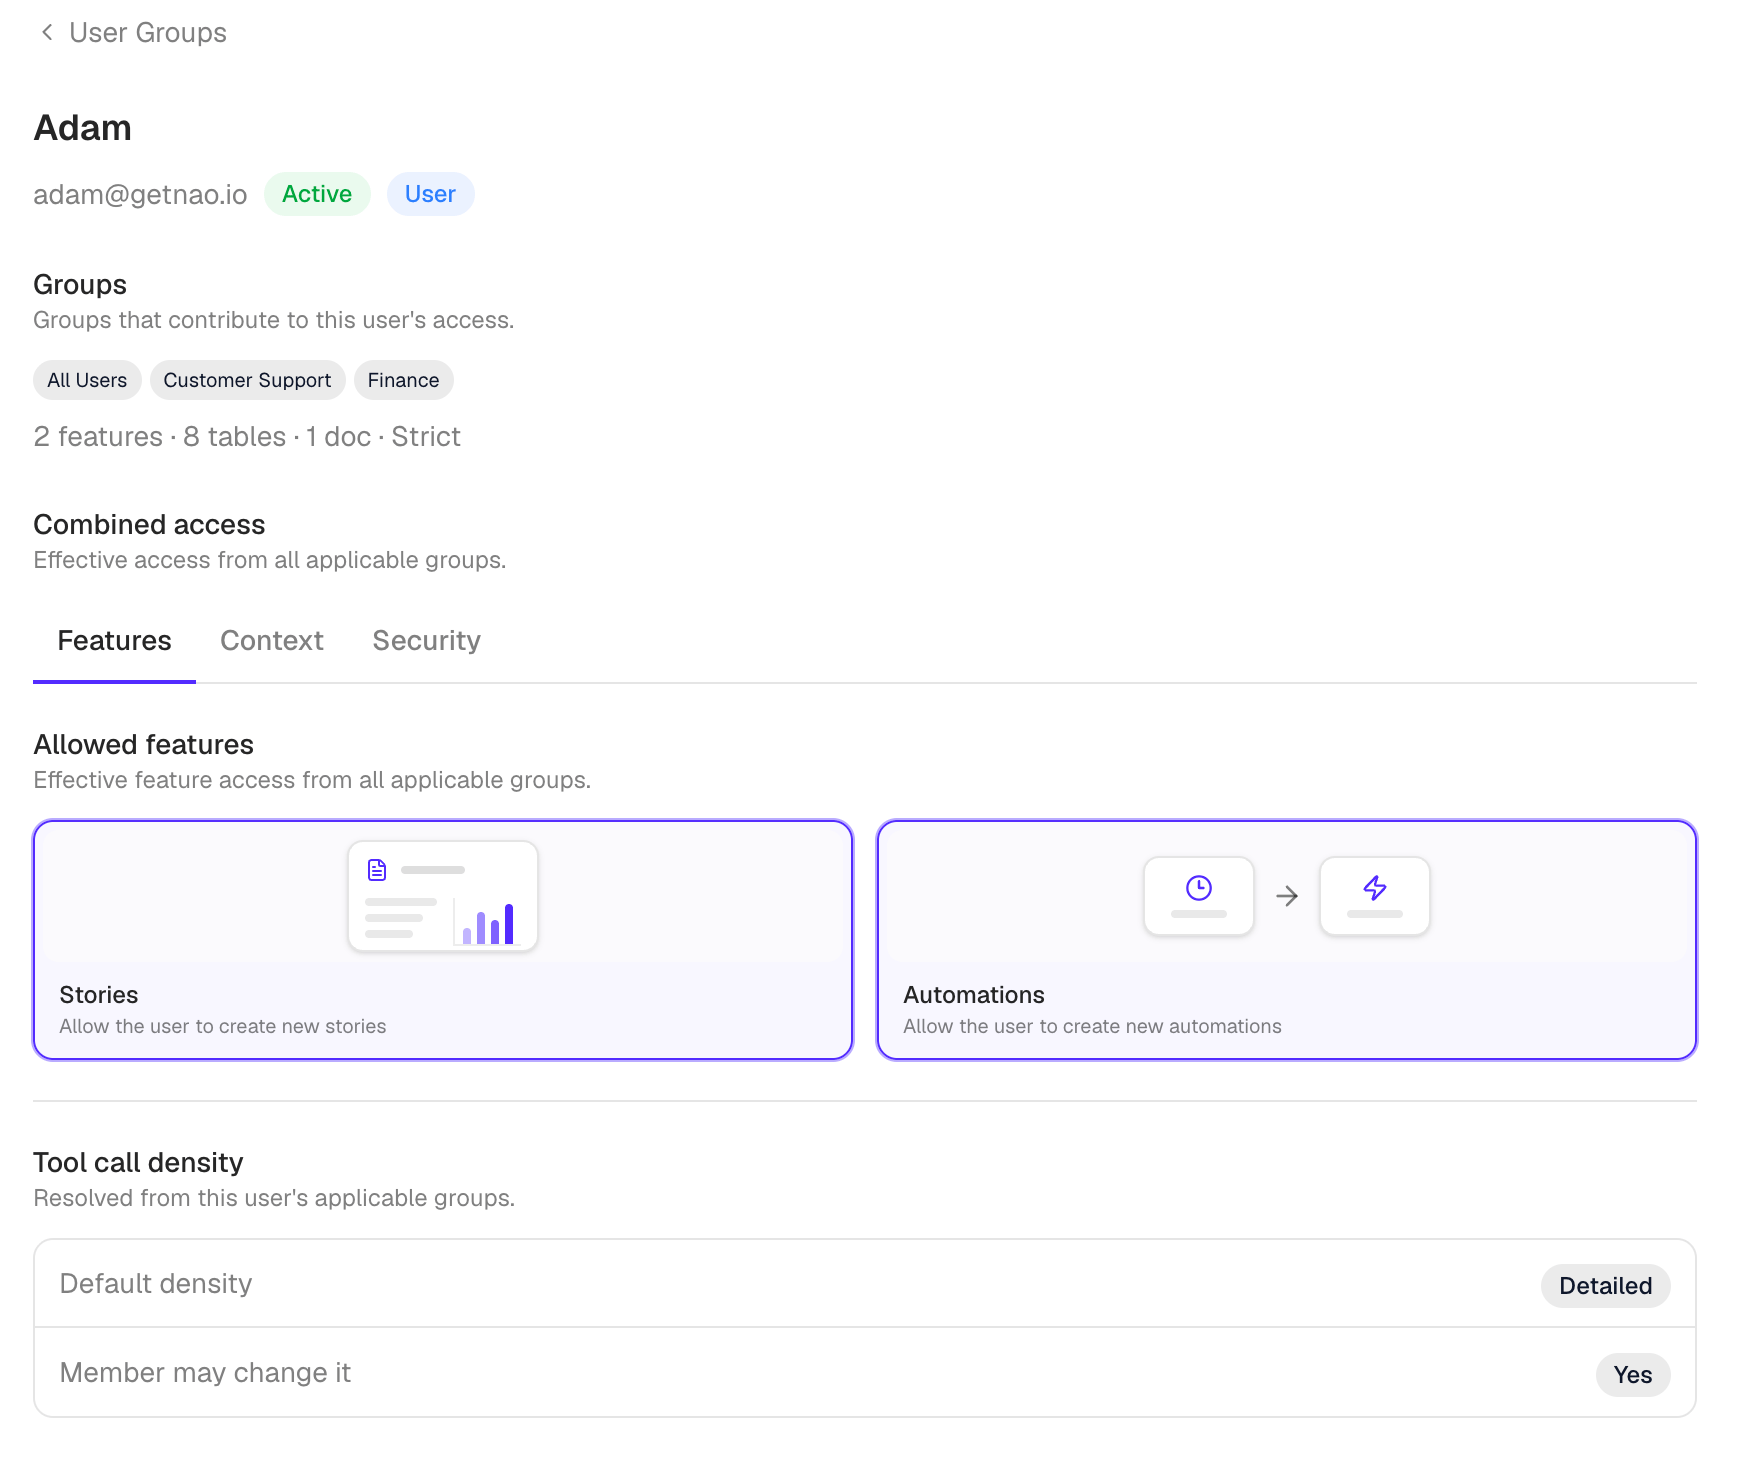
Every project has an All Users group. It is created automatically, includes everyone with access to the project, and cannot be renamed, deleted, or assigned manually. A user can also belong to any number of custom groups through:- Manual assignment on the Users tab
- Assignment while an admin adds the user to the project
- SSO group mapping
- A feature is available when any applicable group allows it.
- Database and docs access includes everything allowed by any applicable group.
- A conditional
RULES.mdblock is included when any named group matches. - Row-level filters are combined as a union of each level of access the groups grant. If one group the user is part of restricts a table’s rows but another gives full acess, the user has full access to that table.
Plans and limits
User Groups are available on the free plan.- Free projects include All Users plus three custom groups.
- Enterprise licenses with the
user-groupsentitlement enable unlimited custom groups. - SSO group mapping requires the
ssoentitlement. - nao-managed row-level security requires its own Enterprise entitlement.
Create a group and assign users
The Manage Groups tab summarizes each group’s users and access. Open a group to edit it, or click Create group to add one.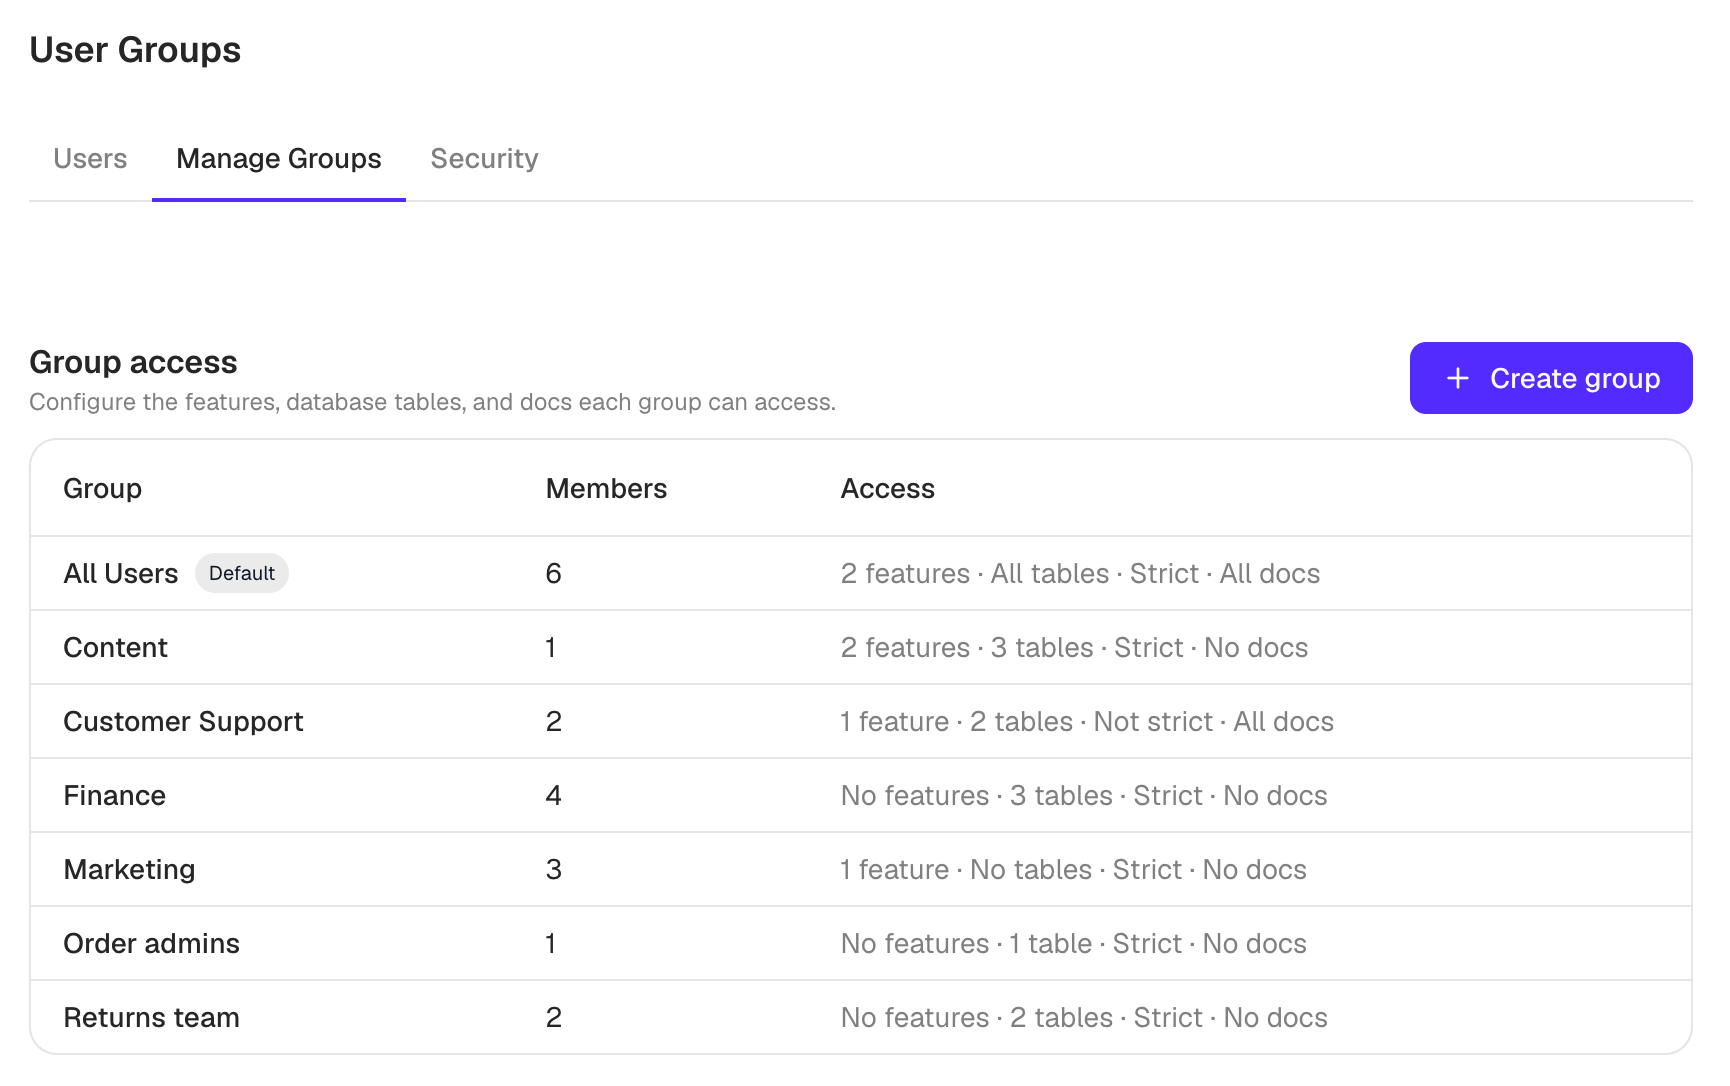
- Open Manage Groups.
- Click Create group and enter a unique name.
- Configure the group’s Features and Context.
- If licensed, configure Security and, when an OIDC or Microsoft Entra provider is configured, SSO.
- Save the group.
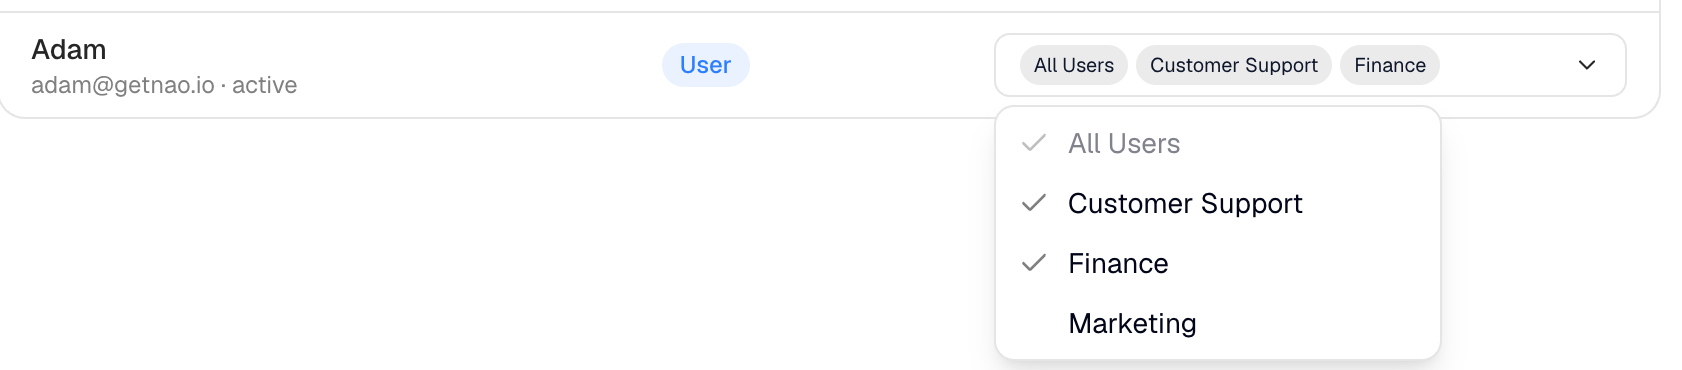
- Open Users, open a user’s group selector, and select the custom groups to assign.
Configure feature access
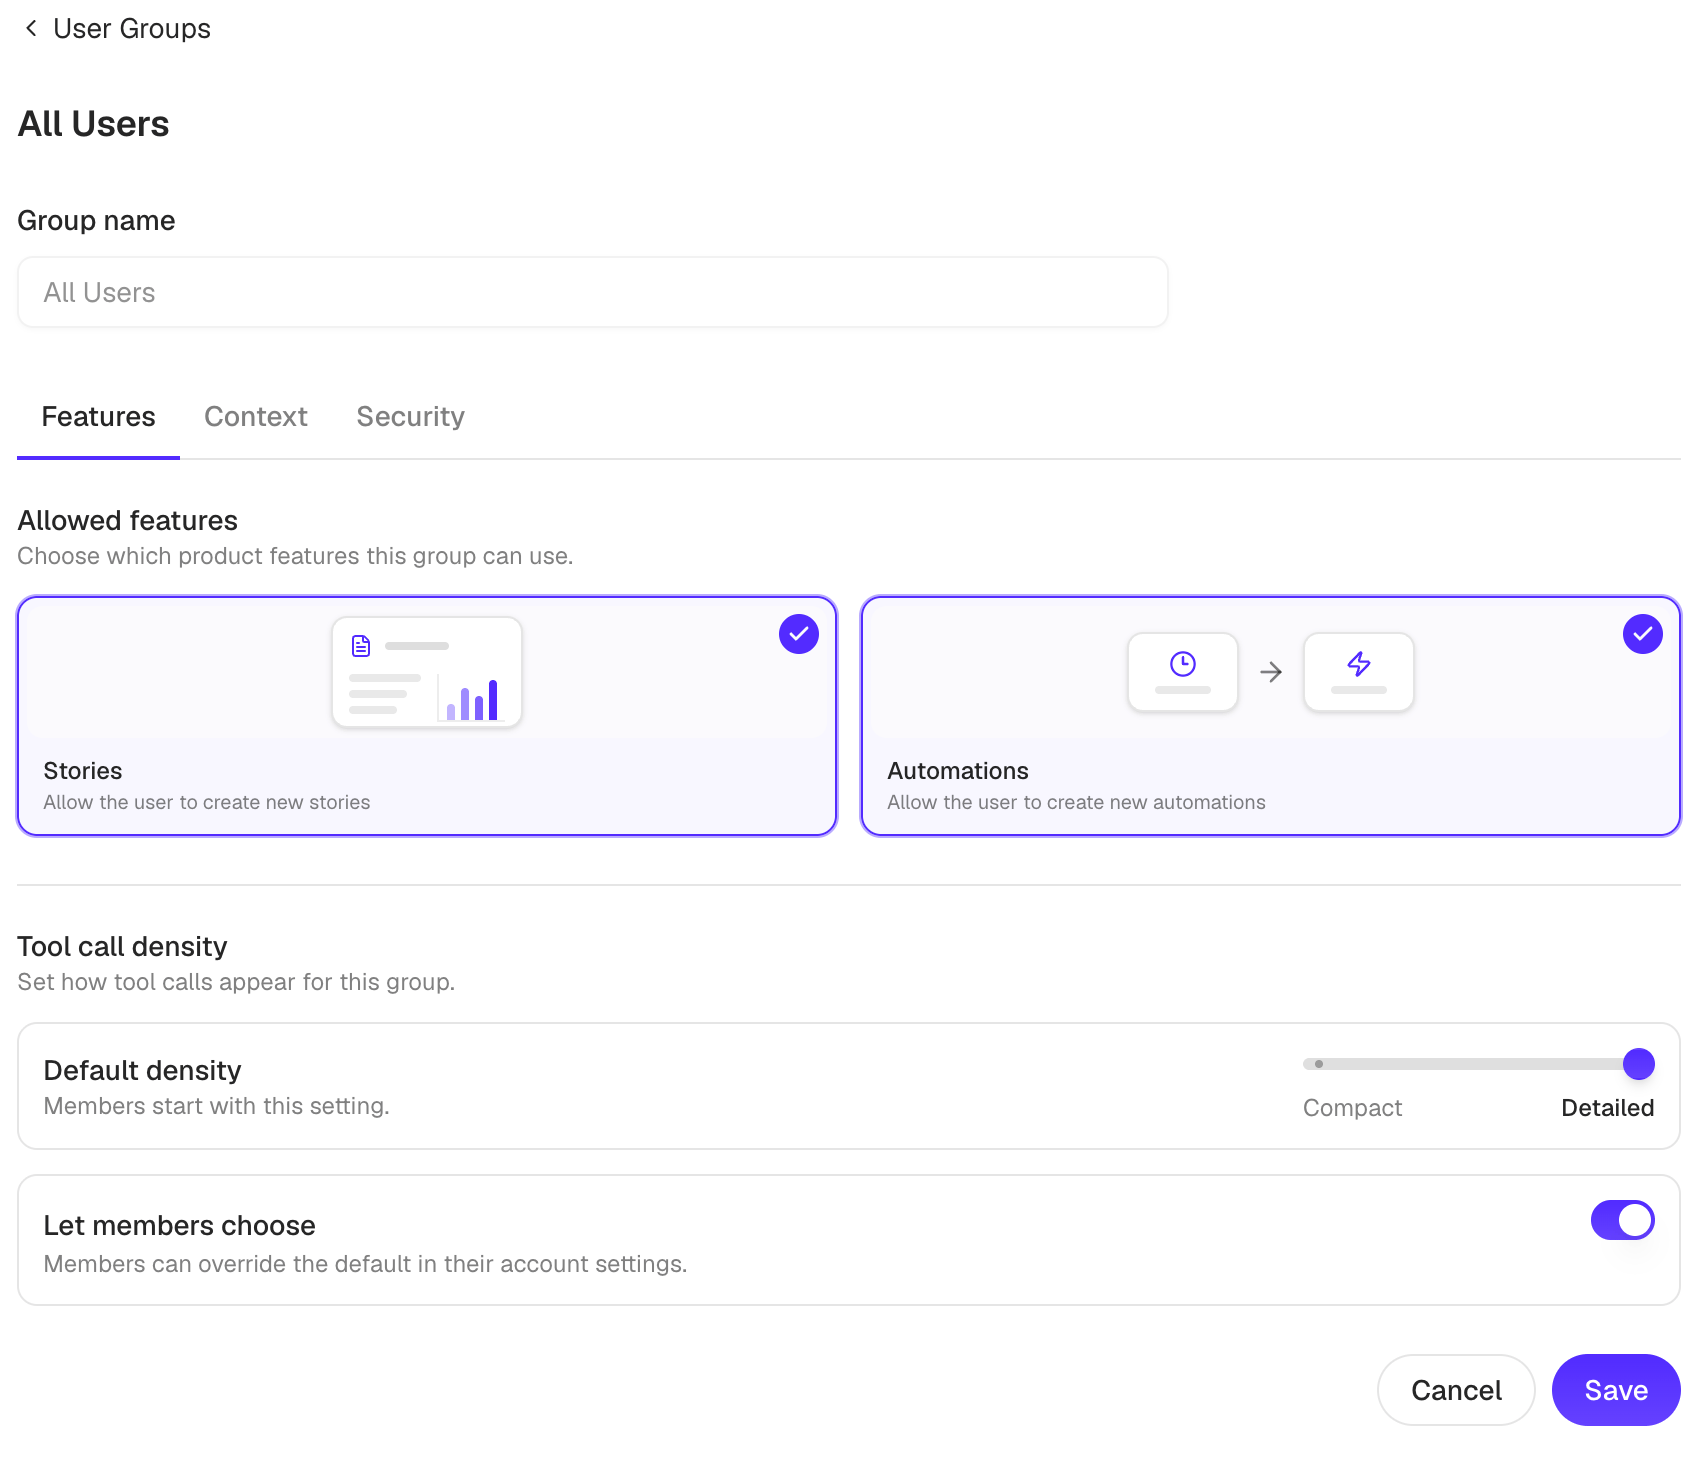
Open Manage Groups, select a group, then open Features.Stories and automations
- Stories allows users to create new stories. Turning it off does not remove access to stories the user can already open or edit.
- Automations allows users to create new automations.
Tool-call detail
User Groups control how much detail the conversation shows for the agent’s tool calls:- Compact
- Detailed
This setting controls the display of tool calls. It does not set the model’s
thinking or reasoning effort.
Limit context access
Open a group and select Context. Choose Everything or Specific context.Database context
For specific access, select databases, schemas, or individual tables from the synced context tree. You can also add dynamicschema.table patterns, for example:
Docs context
Select the wholedocs/ folder, a subfolder, or individual files. A folder grant includes every file below it. Docs grants from applicable groups are also combined.
Strict enforcement
Context permissions always limit the database context and docs that the agent can discover or read. This includes its file-reading, listing, search, and sandbox tools. Turn on Strict mode to also block warehouse SQL that references a table outside the user’s combined database access. If nao cannot safely parse and validate a query, it blocks the query instead of running it. When several groups apply, Strict mode is enabled if any of them enables it, and the SQL allowlist is the union of their database access.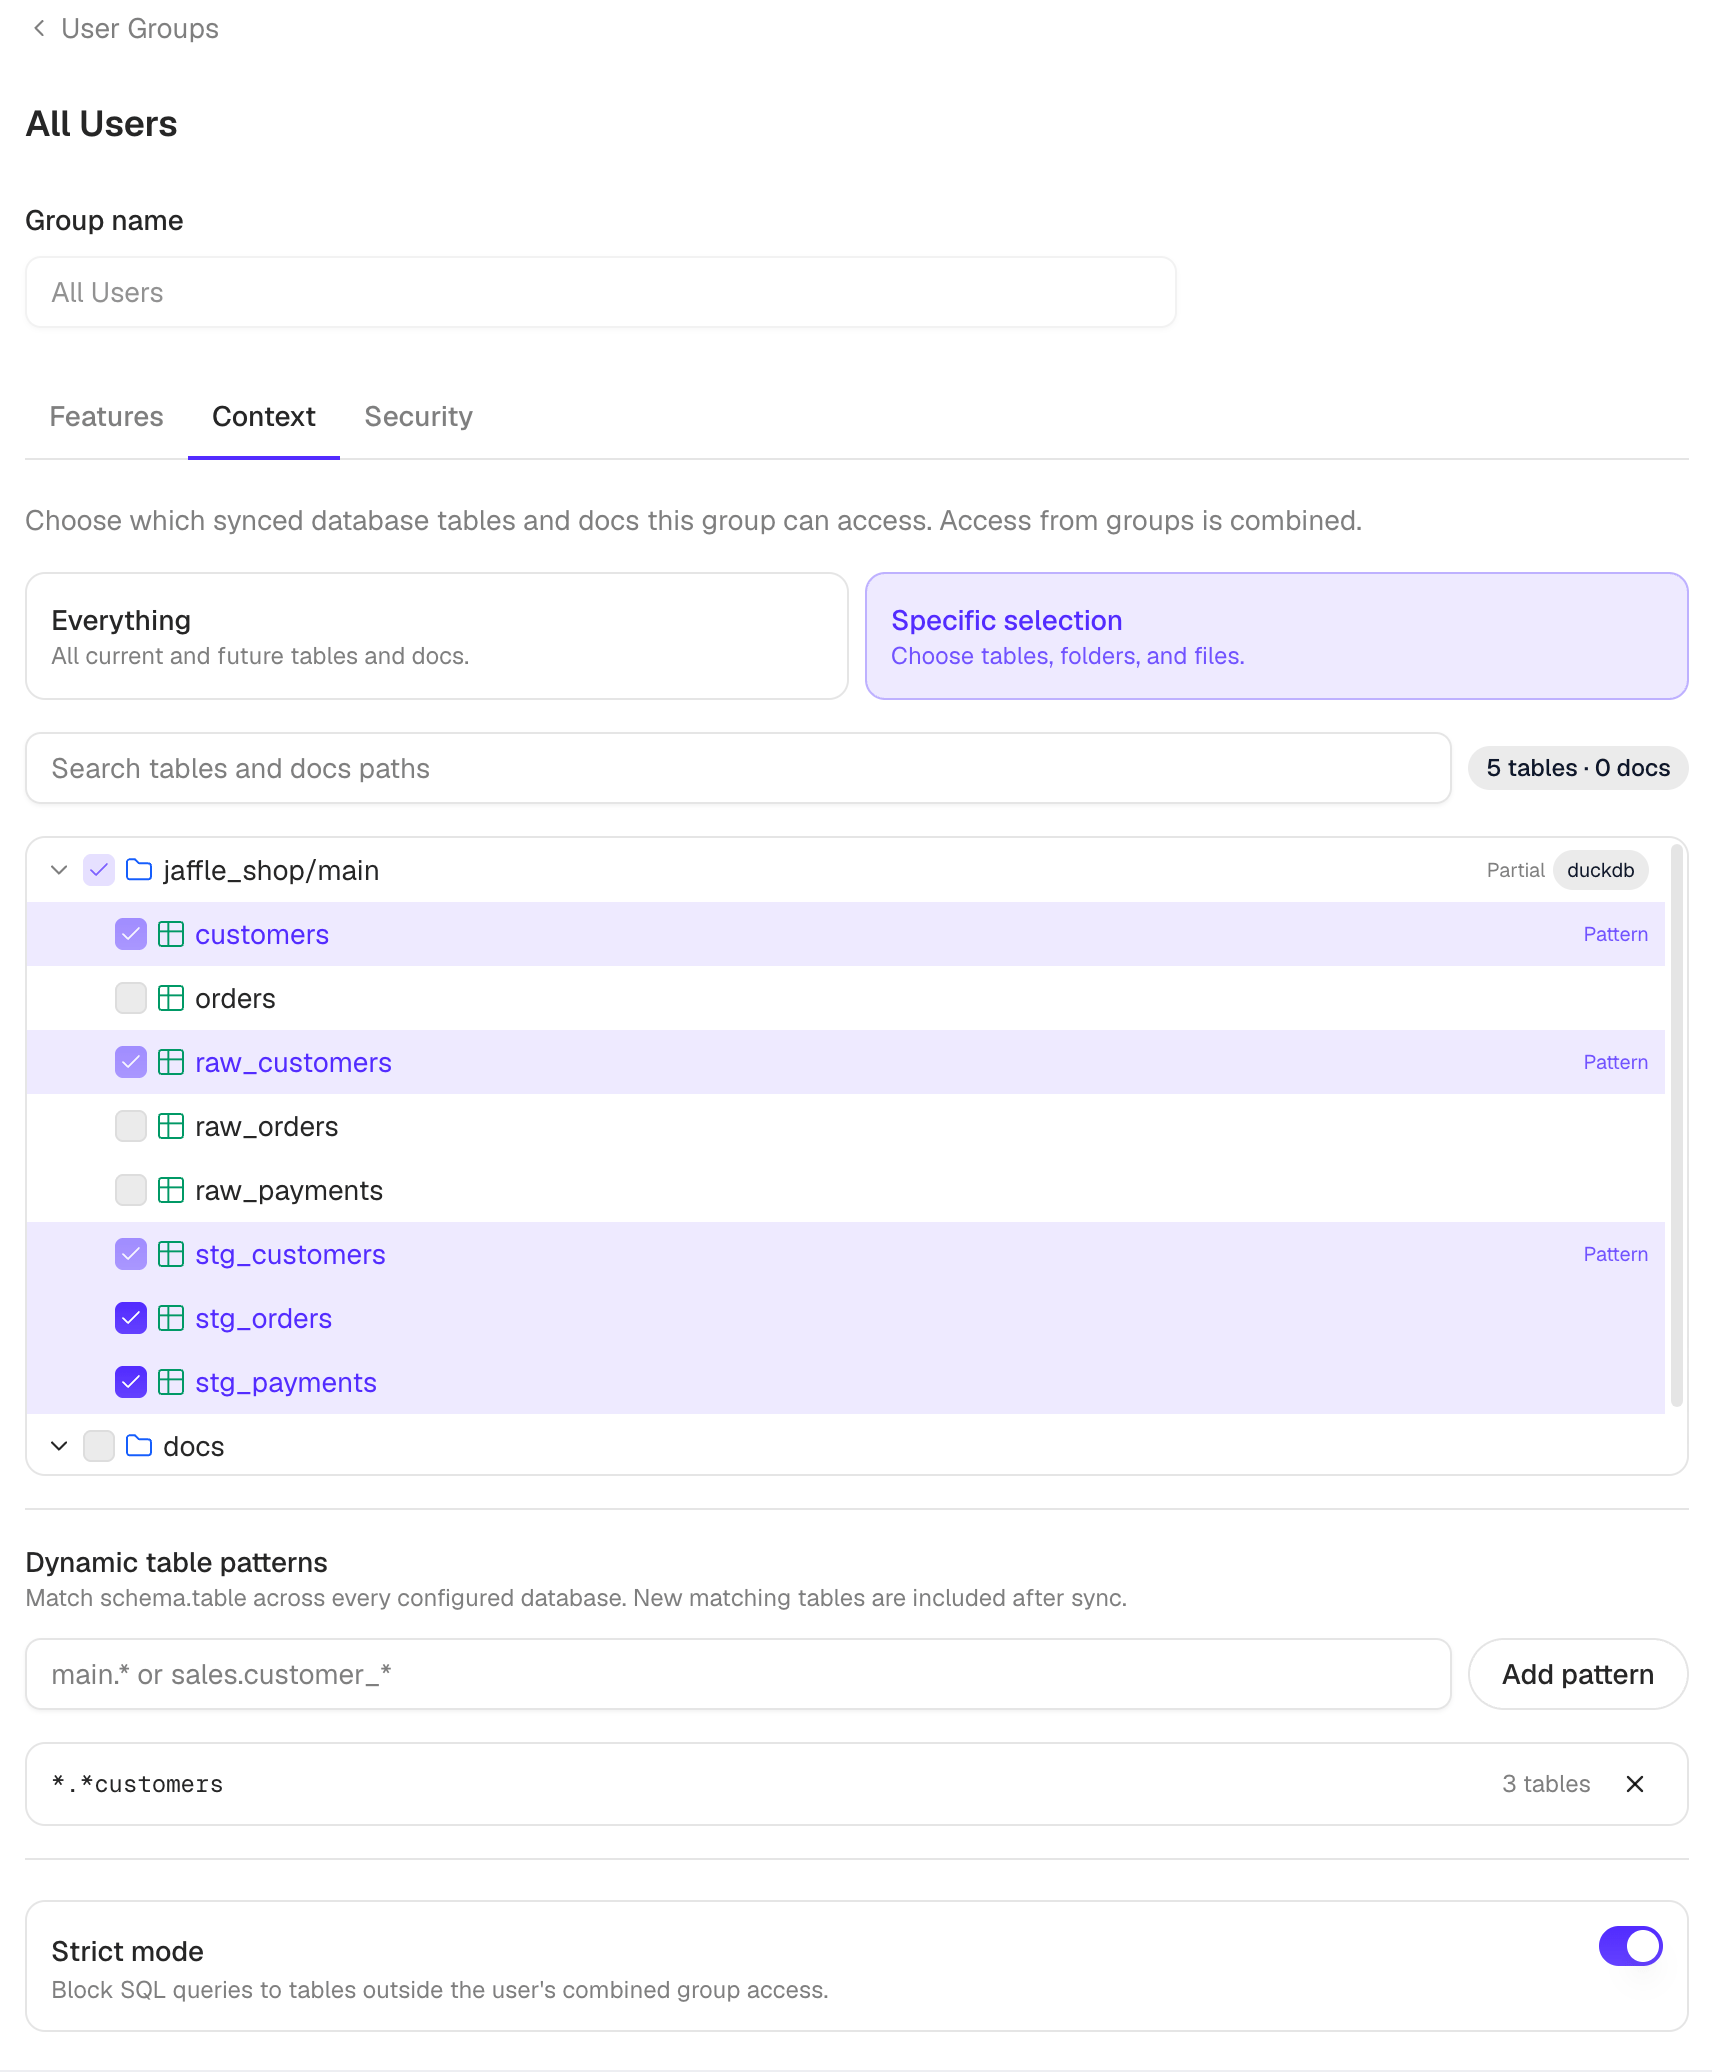
Add conditional rules by group
Conditional group blocks are supported only in theRULES.md file at the project root. For example:
RULES.md and use Preview as to select one or more custom groups. The preview always includes All Users and renders the same conditional content those memberships would receive.
nao test renders the root RULES.md with the groups of the account authenticated by the CLI. Sign in as the intended test user when validating group-specific behavior.
Map SSO groups
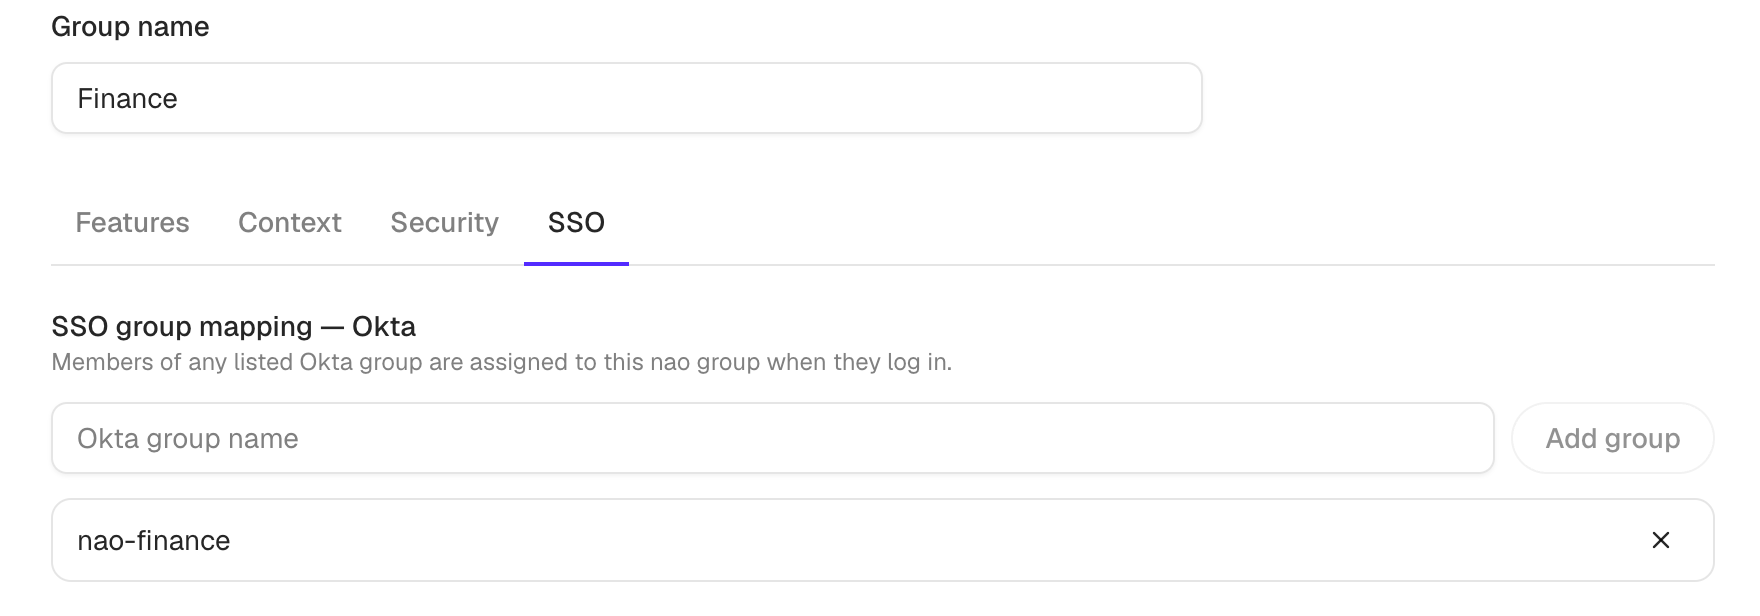
Open a custom User Group and select SSO. The tab is shown only when:- The license includes the
ssoentitlement, and - A generic OIDC or Microsoft Entra provider is configured.
- For generic OIDC, add group names from the configured groups claim.
- For Microsoft Entra, add group Object IDs, not display names.
- Multiple identifiers in one nao User Group use OR semantics.
Configure mappings with environment variables
Self-hosted deployments can manage the same mappings through environment variables:idp-group:project-id:nao-group. Separate multiple entries with commas.
The project scope is either the internal project ID or * for every project. An exact project mapping takes precedence over a wildcard. To copy the ID, open Settings -> Project Settings & Budget and use the copy button beside Project ID in the Information card.
An environment mapping overrides a UI mapping for the same external identifier and project. This also applies when the environment target is missing, locked, or otherwise unavailable: nao does not fall back to the UI target. Environment-controlled mappings appear as read-only in the UI.
Set the default project role
Each nao User Group can define a Default project role for SSO provisioning.- The role creates project access only when the user does not already have explicit project access.
- Existing explicit or manually assigned project roles are never changed.
- If several matched groups define a role, the strongest wins:
admin>context_admin>user>viewer. - Use organization role creates no explicit project role, so normal organization access applies.
Login synchronization
On every OIDC or Microsoft Entra login, nao reconciles SSO-managed User Group memberships from the latest provider claims and reapplies configured organization-role mappings. Existing manually assigned project roles remain unchanged. In self-hosted deployments, a successful OIDC or Entra login restores an orphaned existing user to the default organization before synchronization. New SSO users are not pre-added to the default project, so a matched User Group’s default project role can apply on their first login. See Authentication for provider setup, organization-role mappings, and Microsoft Entra group claims.Configure row-level security
nao-managed row-level security (RLS) limits rows at warehouse SQL execution time. Policies are assigned to groups, not individual users.1. Register protected tables
- Open the project-level Security tab in User Groups.
- Click Add protected table.
- Select one or more synced tables.
- For each table, select the constraint columns that group policies may use.
- Save.
2. Set each group’s row access
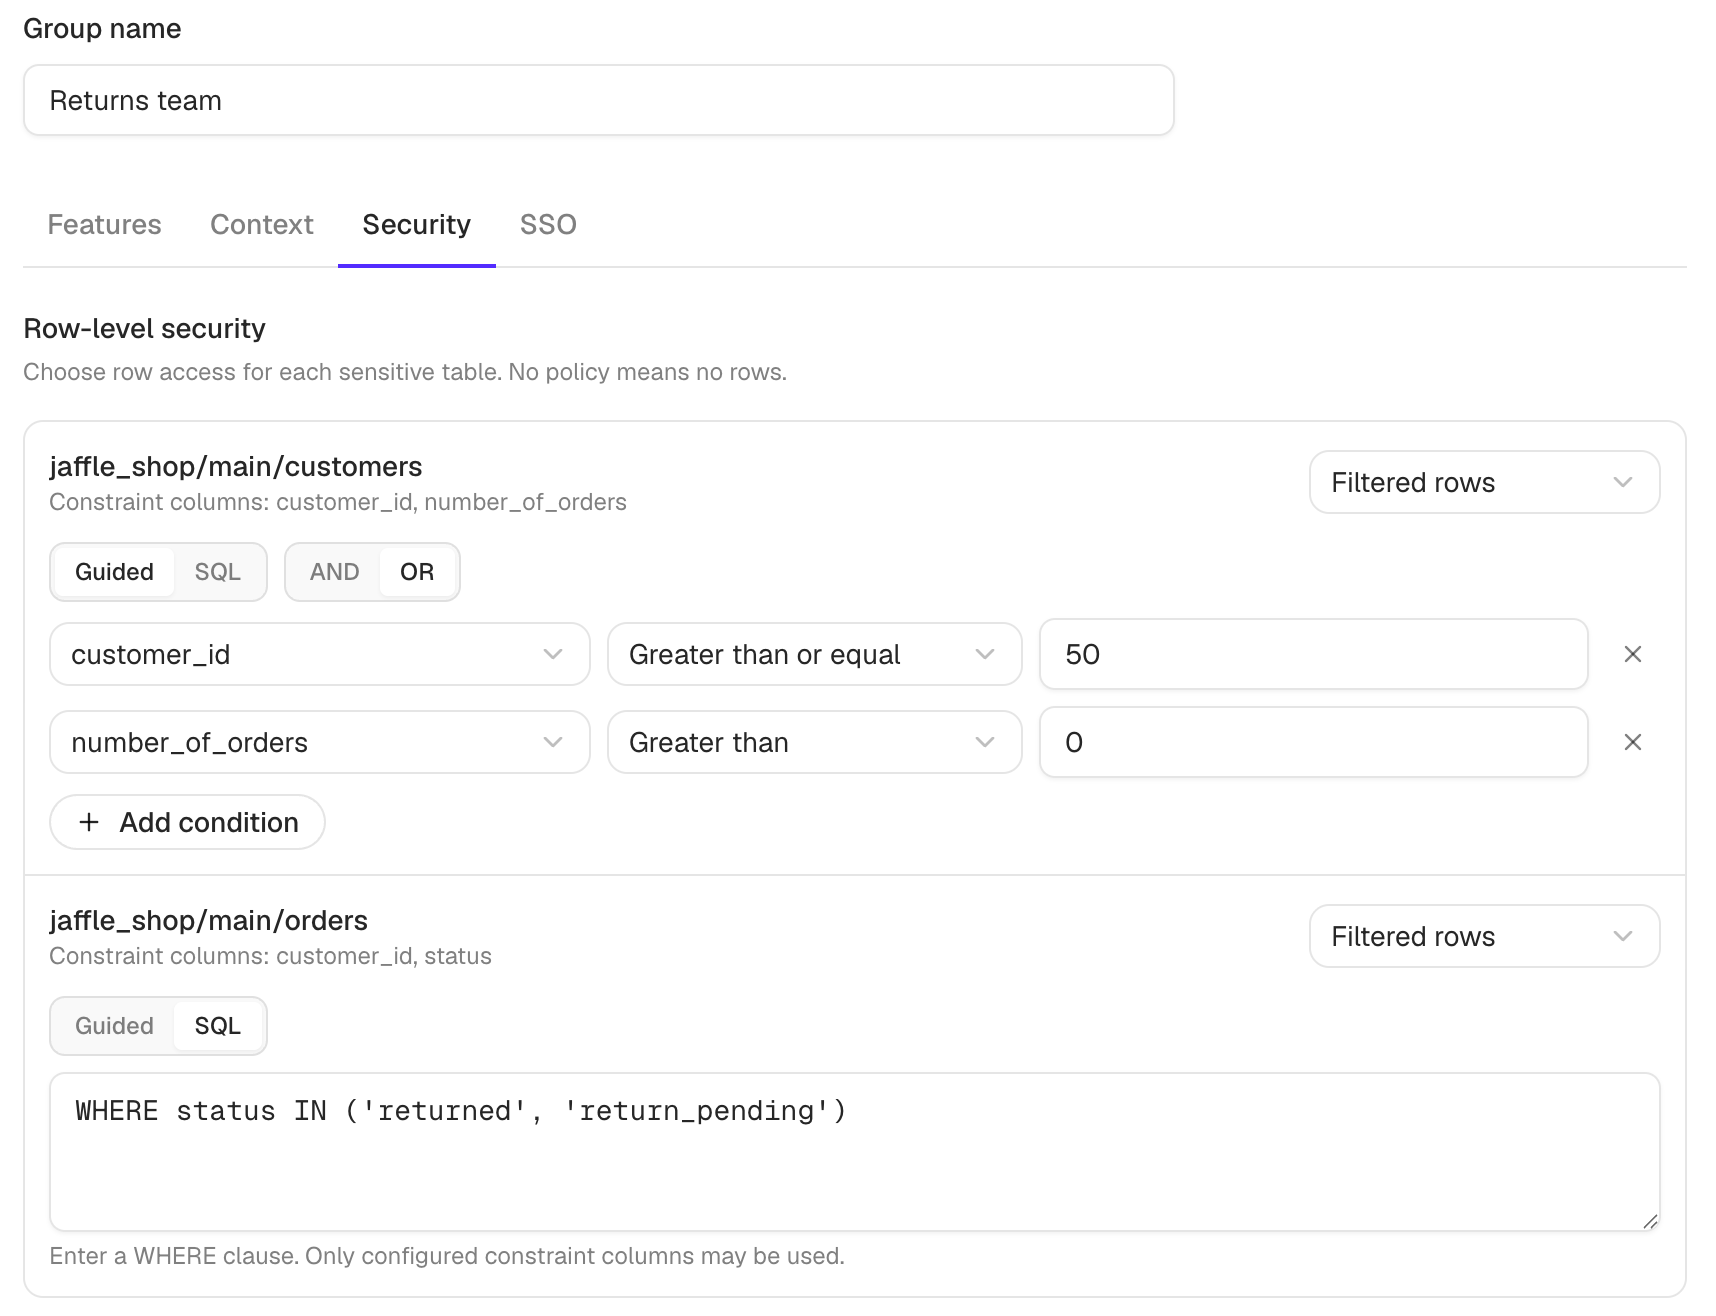
Open Manage Groups, select a group, then open Security. For each protected table available through this group’s Context permissions, choose:- No rows - users get no rows from this group. This is the default when no policy is configured.
- Filtered rows - users get rows matching a filter.
- Full access - this group adds no row restriction for the table.
- Guided - build conditions using the registered constraint columns. When there are multiple conditions, choose AND or OR.
- SQL - enter a manual predicate beginning with
WHERE, for exampleWHERE region = 'EMEA'.
Combine row policies across groups
For each protected table, nao resolves all applicable group policies:- Filtered policies are combined as a union (with OR).
- Full access from any applicable group removes the row restriction.
- No rows does not override filtered access, so No rows plus a filtered policy results in the filtered rows.
- If no applicable group supplies Full access or a valid filter, the user gets no rows.
Column exclusion is a separate licensed control and is not configured through
User Groups or row-level security.