- Responds to messages in Teams channels and group chats
- Can also answer from direct messages in Teams
- Processes questions using the same agent as the web chat interface
- Returns answers with SQL queries, data tables, and visualizations
- Maintains conversation context within threads
The Teams bot uses the same agent context, rules, and capabilities as your web
chat interface. Any improvements to your agent automatically benefit Teams
users.
Setup
Step 1: Create an Azure Bot
- Go to https://portal.azure.com
- Click “Create a resource”
- Search for “Azure Bot” and select it
- Click “Create” and fill in:
- Bot handle: Unique identifier for your bot
- Subscription: Your Azure subscription
- Resource group: Create new or use existing
- Pricing tier: F0 (free) for testing
- Type of App: Single Tenant (recommended for enterprise)
- Creation type: Create new Microsoft App ID
- Click “Review + create” then “Create”
Step 2: Open the Teams Integration in nao
- In nao, click on your profile → “Project” → “Microsoft Teams”
- Keep this page open — you will paste your credentials here in the next step
Step 3: Get App Credentials
- Go to your Bot resource, then “Configuration”
- Copy the Microsoft App ID and paste it as App ID in nao
- Click “Manage Password” (next to Microsoft App ID)
- In the App Registration page, go to “Certificates & secrets”
- Click “New client secret”, add a description, select expiry, click “Add”
- Copy the Value and paste it as App Password in nao
- Go to “Overview”, copy Directory (tenant) ID and paste it as Tenant ID in nao
- Click “Save” in nao. Automatically, a file “app.zip” will be downloaded
Step 4: Configure the Bot Endpoint
- In nao, Copy the Messaging Endpoint URL
- Go back to your Azure Bot resource → “Configuration”
- Paste the URL into the Messaging endpoint field
- Click “Apply”
Step 5: Enable the Microsoft Teams Channel
- In your Azure Bot resource, go to “Channels”
- Click on “Microsoft Teams”
- Accept the Terms of Service and click “Agree”
- Click “Apply”
Step 6: Configure App Registration
- In the Azure portal, go to “App registrations” and open your bot’s app
- Go to “API permissions”
- Click “Add a permission” → “Microsoft Graph” → “Application permissions”
- Search for and add both
User.Read.AllandDirectory.Read.All - Click “Grant admin consent” to activate the permission
- Go to “Authentication”
- Under “Supported accounts”, select “Multiple Entra Id tenants”
- Check “Allow all tenants”
- Click “Save”
Step 7: Install the Bot in Teams
- In Microsoft Teams, click “Apps” in the left sidebar
- Click “Manage your apps” → “Upload an app” → “Upload a custom app”
- Select “app.zip”
- Start talking to your bot
Usage
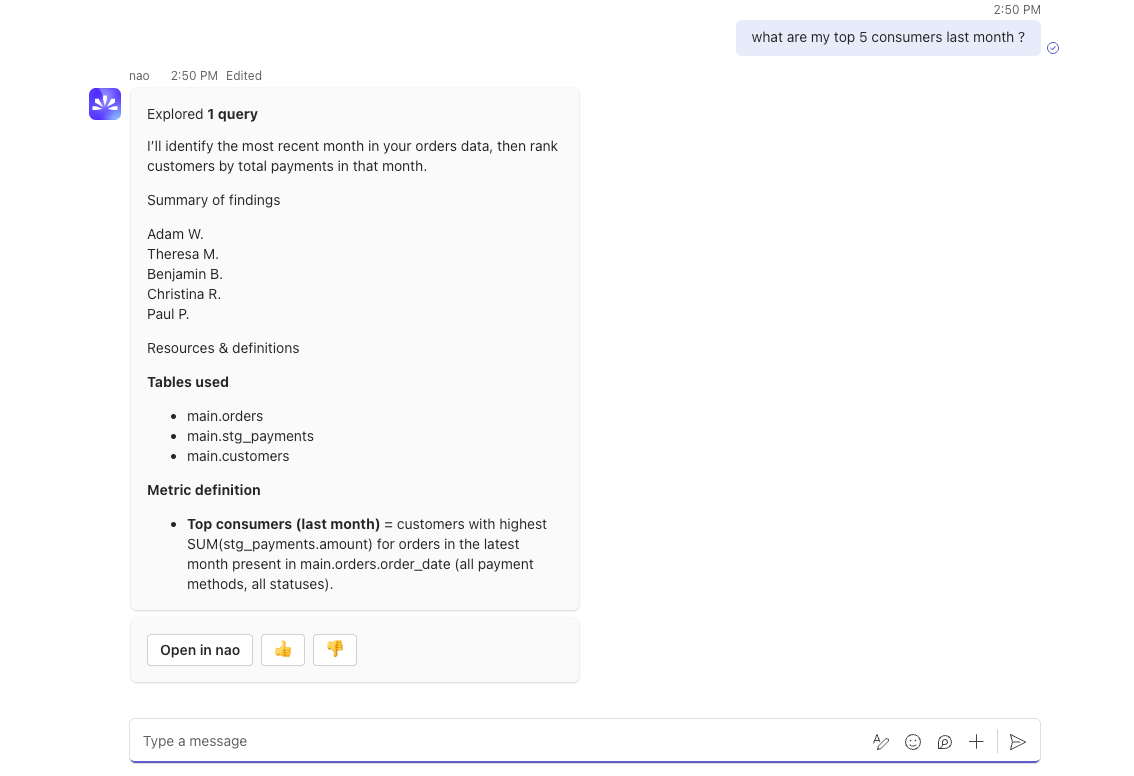
Ask Questions Mention the bot in any channel:- Process your question using the same agent as the web interface
- Generate SQL queries based on your context
- Execute queries against your connected databases
- Return results in a formatted Teams message
- Send you the link to the full conversation to open it in the browser UI
The bot replies in threads to keep conversations organized. Use thread replies
for follow-ups.
Chat Overview
Learn about the web chat interface
Self-Hosting Guide
Deploy nao with Docker or on your own Cloud Run instance