Set up your dbt connection to: preview dbt models, get lineage, give dbt tools to nao AI.
Learn more about nao x dbt features: Work with dbt. To configure dbt, open the “dbt configuration” panel. It is available in the home page of nao, or at the left of the bottom bar.

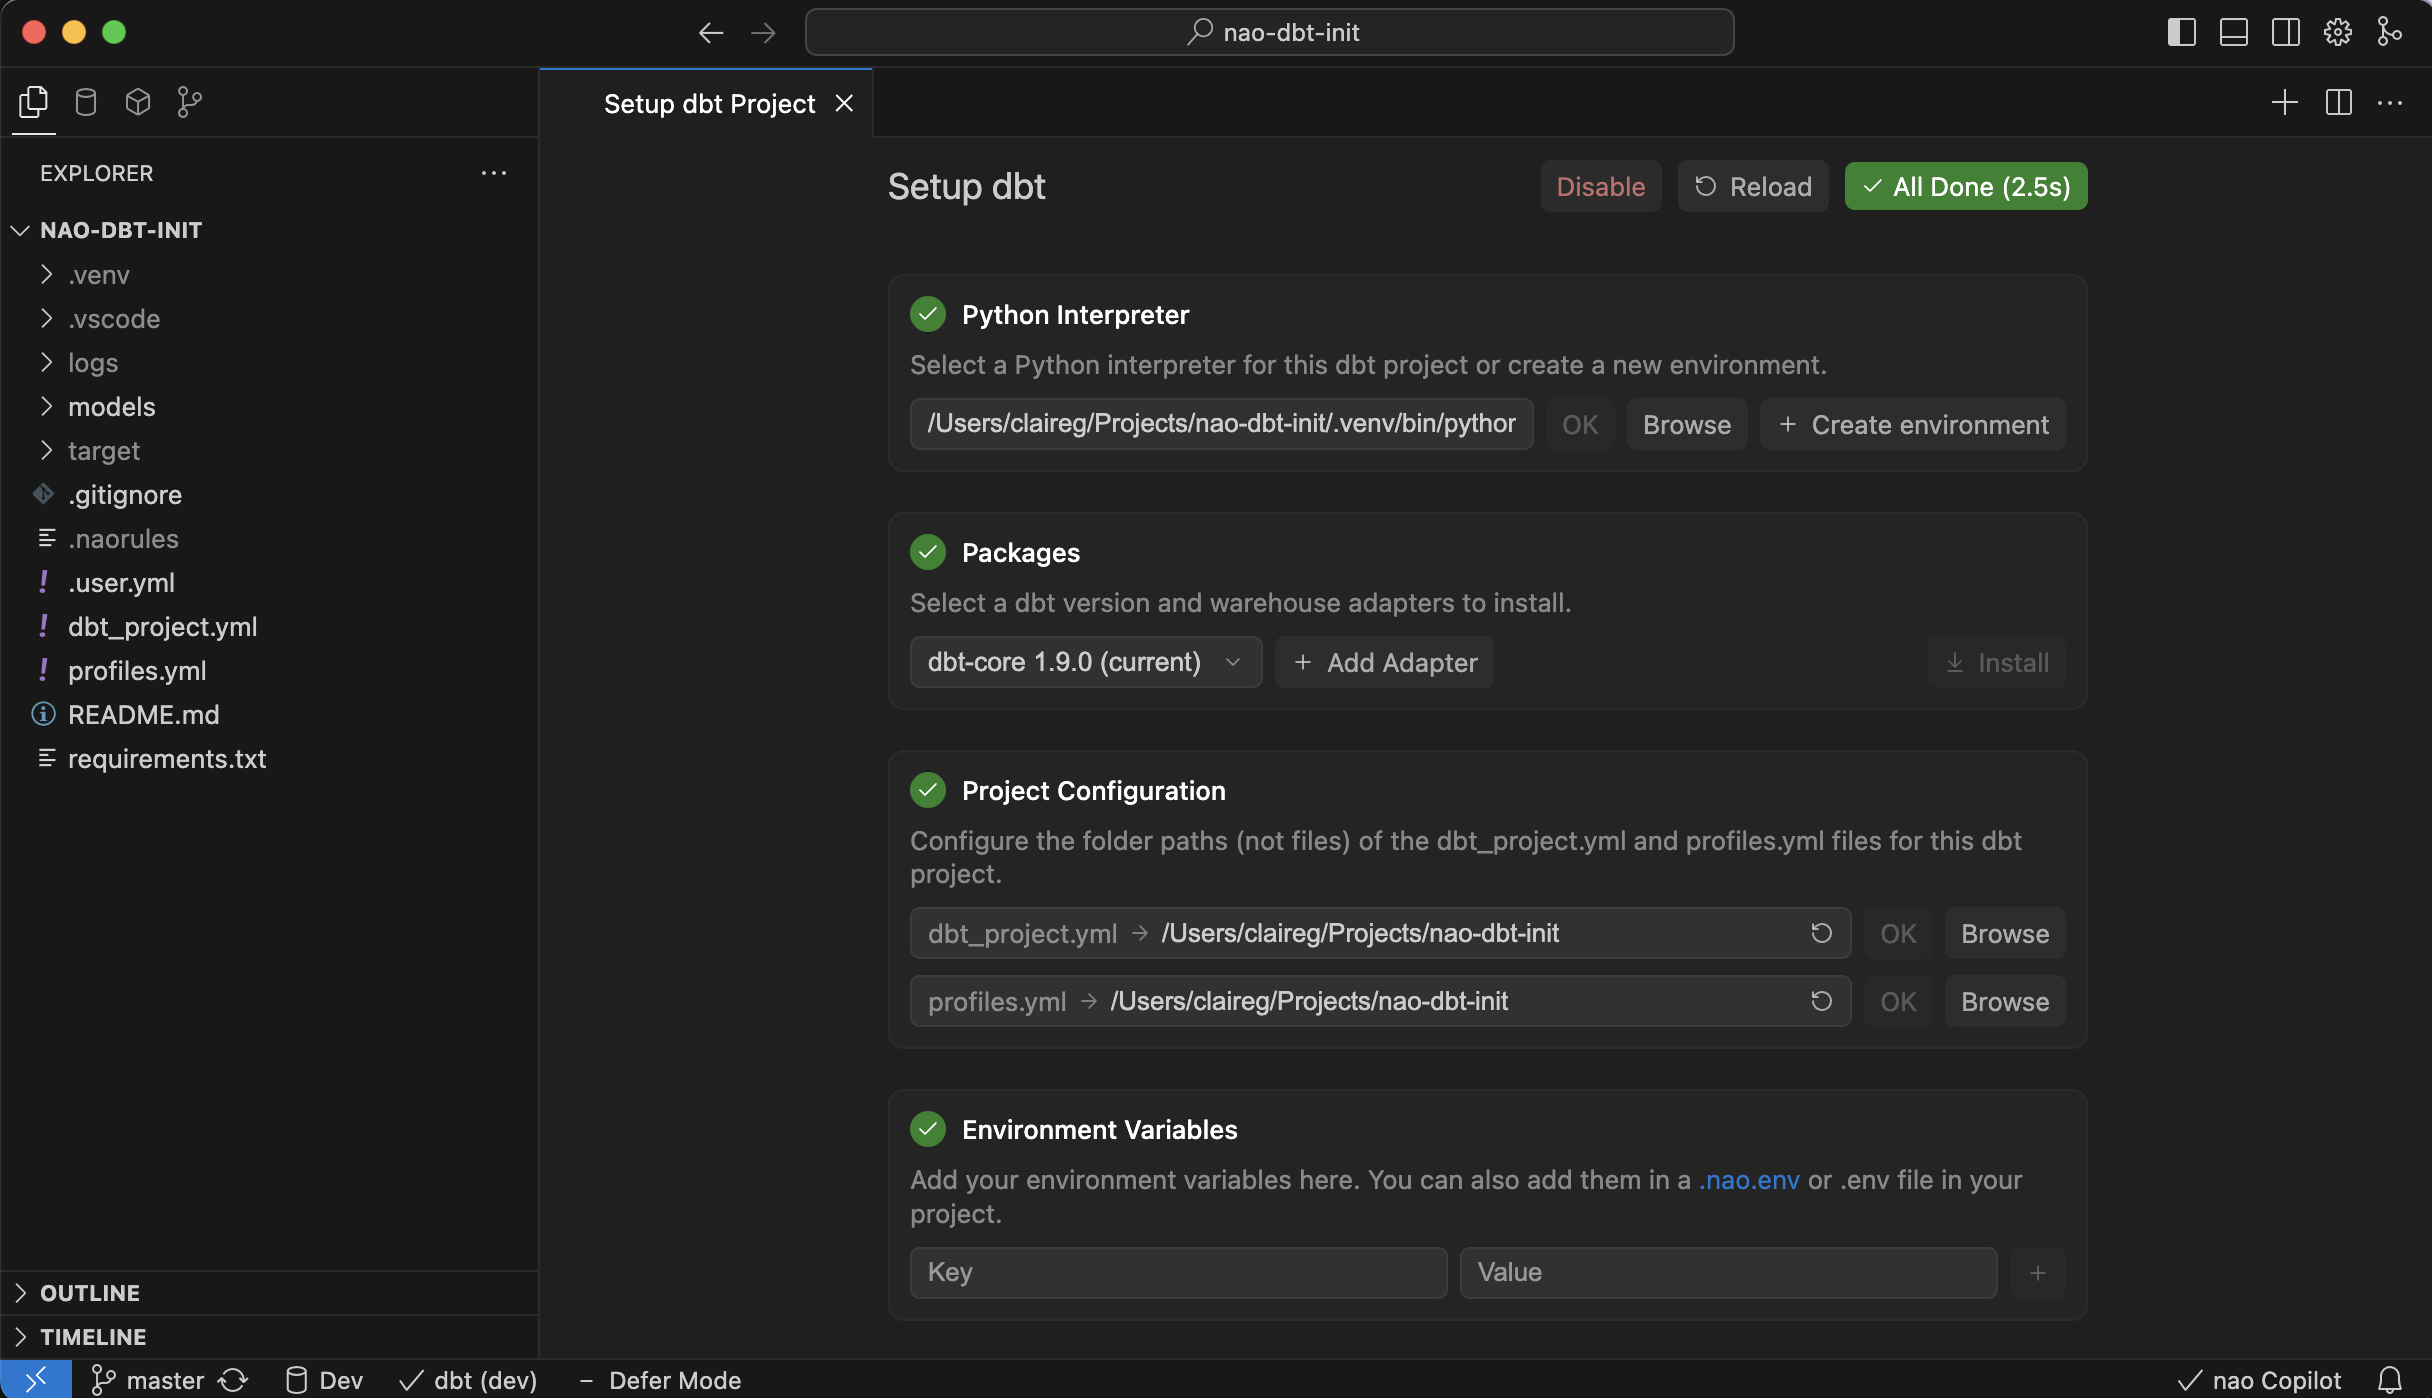
dbt configuration panel
1
Enable dbt
Activate dbt detection.
2
Pick a Python interpreter
Choose an existing interpreter / virtual environment or create a fresh virtual environment for the project.
3
Install packages
Select the dbt-core version and install any warehouse adapters (Snowflake, BigQuery, etc.) your project needs.
4
Point to project files
Set the folders that contain
dbt_project.yml and profiles.yml. nao will try to find them automatically.5
Add environment variables (optional)
Populate secrets or configs inline, or reference a
.nao.env / .env file. Existing .env values are imported automatically.6
Select the target
Pick the dbt target defined in
profiles.yml (for example dev, prod). You can change it later on the bottom left bar.7
Enable dbt defer (optional)
Enable the dbt defer toggle. Provide the production
When editing a dbt model, switch on Defer mode so previews fall back to production data when dev data is missing.
Read more about defer in the dbt docs.
manifest.json you want to defer to.When editing a dbt model, switch on Defer mode so previews fall back to production data when dev data is missing.
Read more about defer in the dbt docs.
Check dbt is setup properlyWhen your dbt project is configured correctly, you’ll see a checkmark in the lower-left status bar. If it shows a cross instead, click the dbt project button to reopen the setup panel and fix any missing steps.
dbt integration requirements
- dbt Core only: nao currently supports dbt Core projects. If you’re on dbt Cloud, run a dbt Core project locally to integrate with nao.
- Local environment: The dbt project must live on the same machine where nao runs; remote dbt environments are not supported.